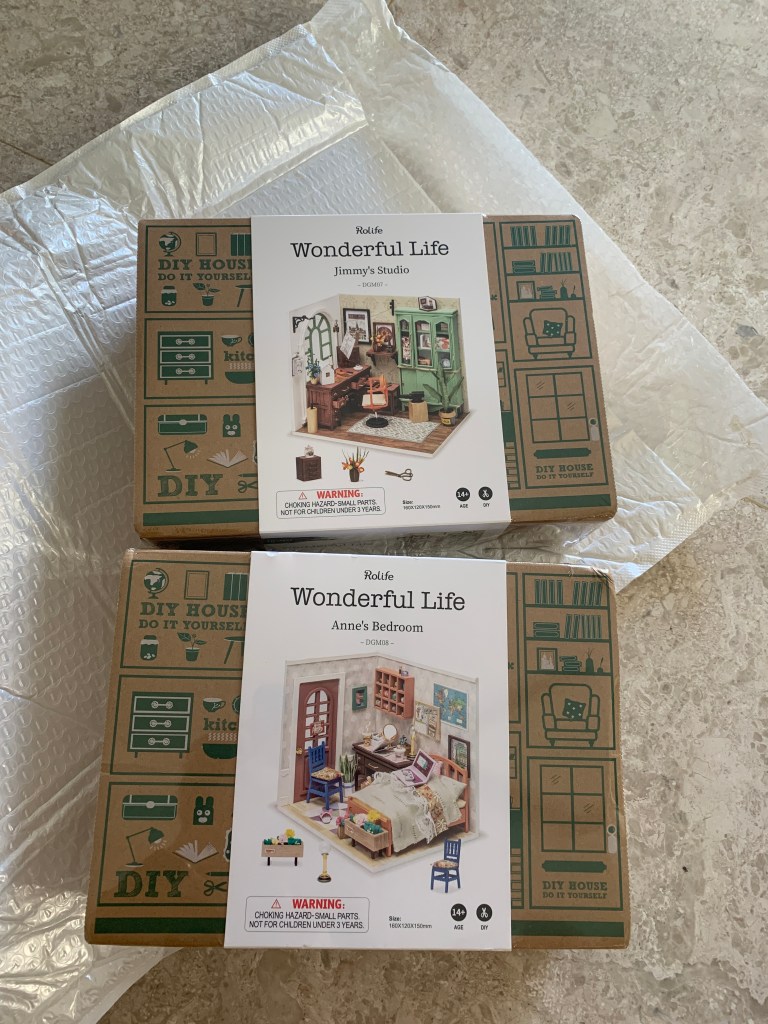
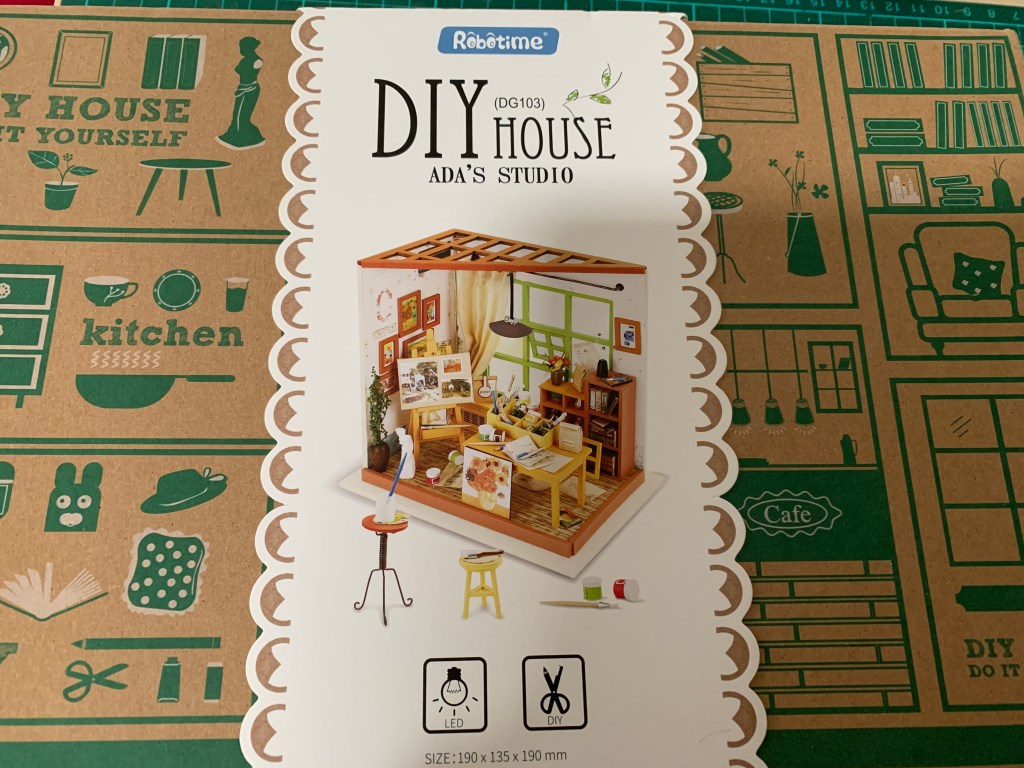
Last week, I caved and bought another two DIY sets from my favorite online shopping site! Unbelievable, considering I already have two DIY sets in queue plus a third set, which was a Christmas present.
The latest two purchases The plan to combine two sets into one
I had this sudden ambitious plan to combine two sets into one unit, hence the two new sets for this purpose. I think it’s just an excuse for simply wanting to buy something. It’s been too long since we last went shopping at the mall, and like I always say, grocery shopping does not count. The need to purchase something is too strong to deny, so online shopping is the best to quell the urge.
And now that I have five sets, I have to decide which one to work on next. Once I get going, I should also have to be disciplined not to buy any more sets as spares.
Sometimes a change in the weather can be a blessing in disguise. We were supposed to have our usual weekend golf game, but it rained the whole of Sunday morning. We decided to go home and not wait around because this type of rain will not cede.
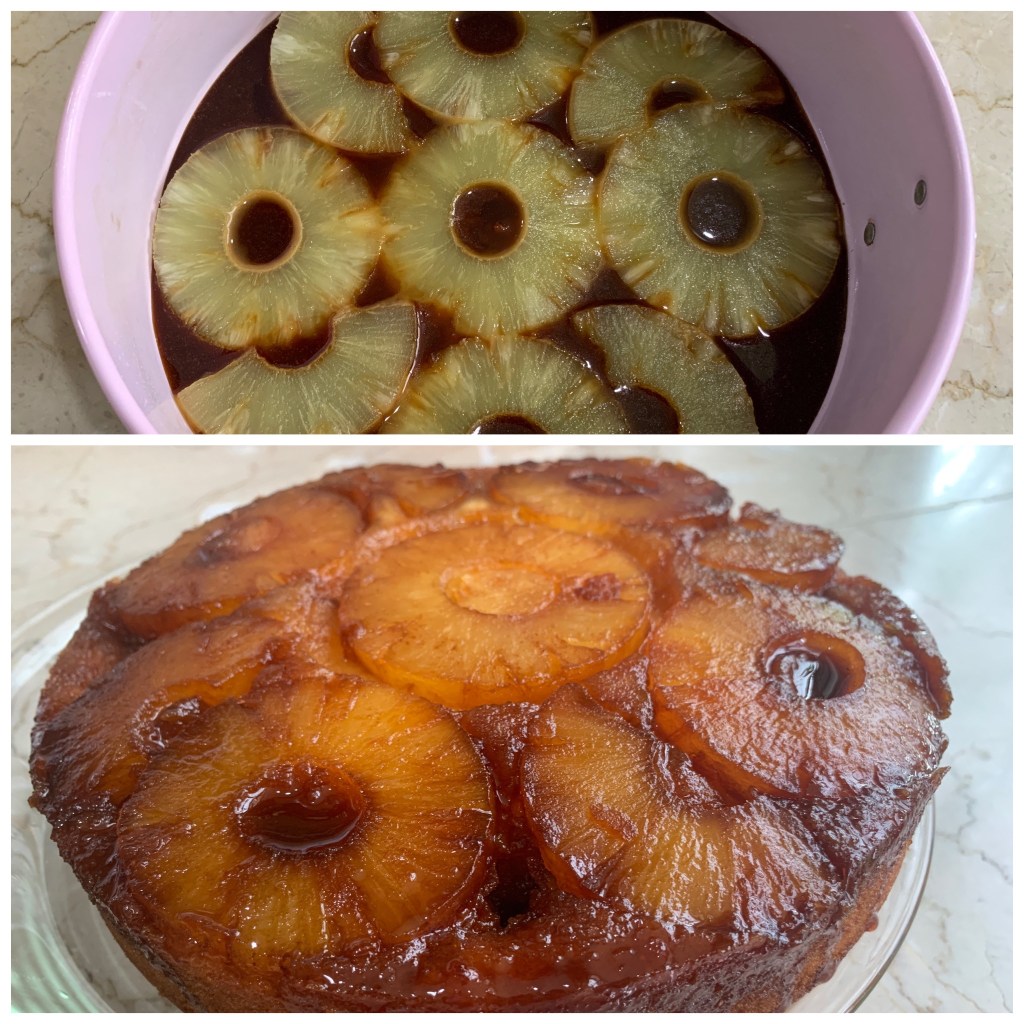
Very yummy effort!
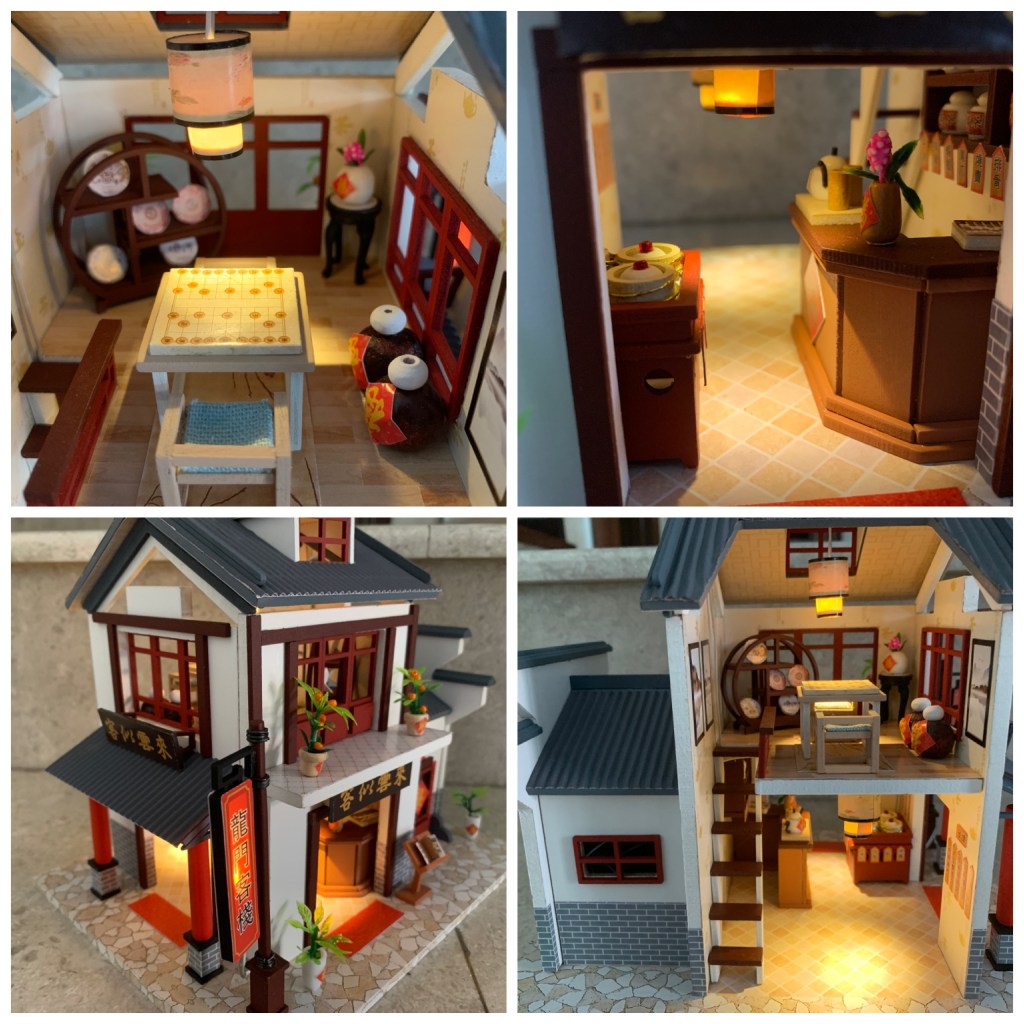
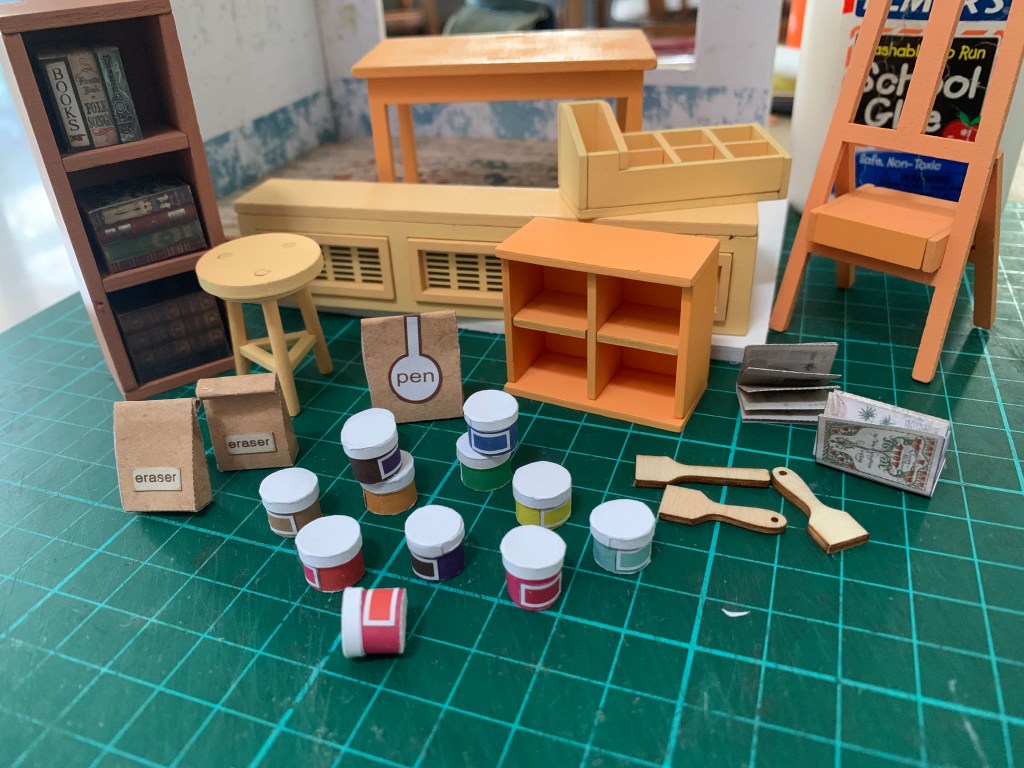
Hubby, of course, baked while I decided to finish up DIY project number 12. I must admit it took some effort because the cool weather was perfect for doing nothing. He attempted a Pineapple Upside Down Cake again because the first attempt failed sometime back. I only had the three lanterns and the last two baskets of the dim sum left to complete.
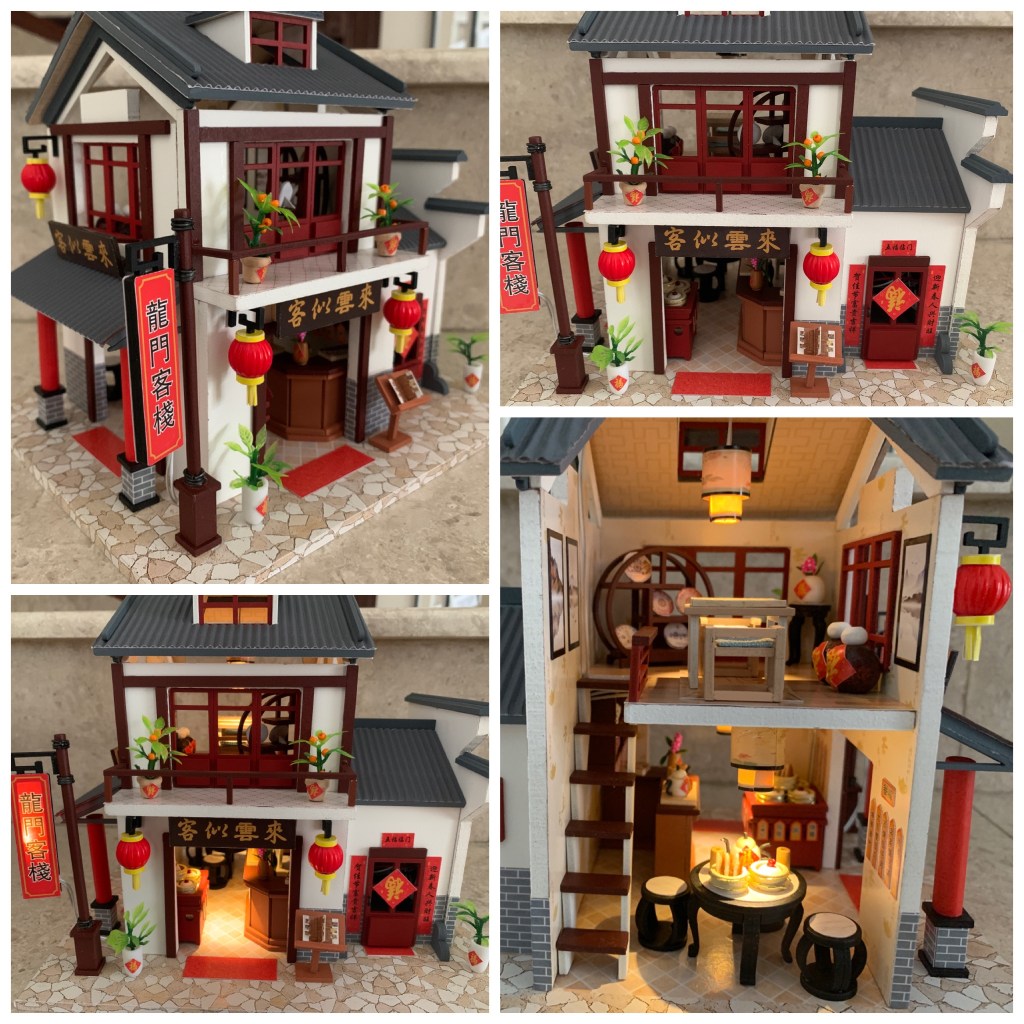
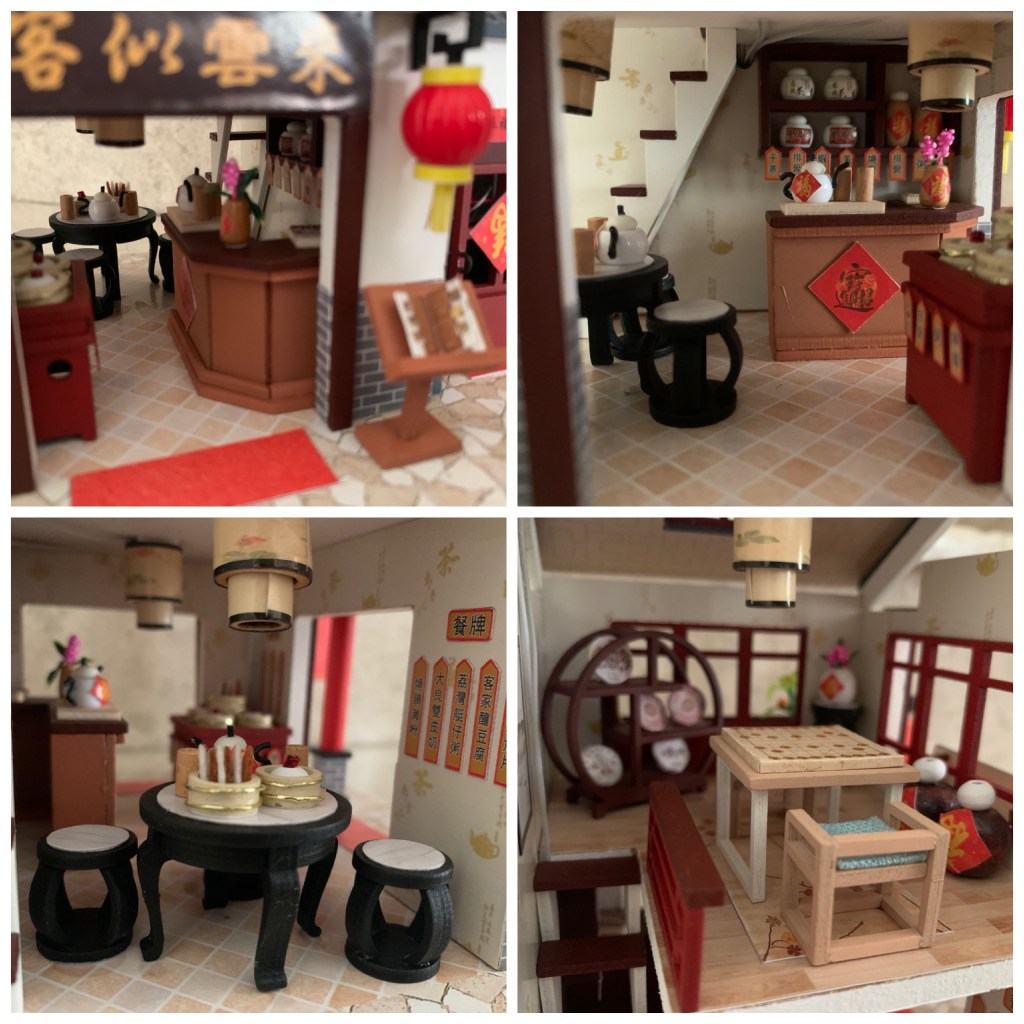
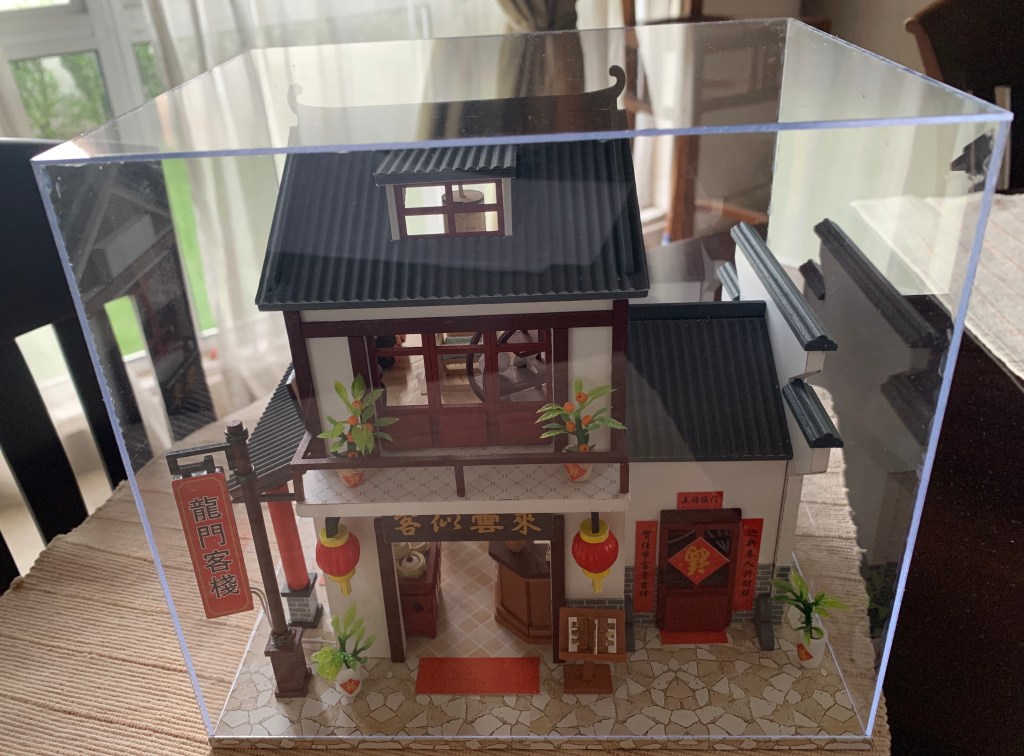
Dragon Gate Inn is such a cute setThe interior, no patrons now due to Covid-19
And when I finally did, the sense of accomplishment was just so rewarding. I even put together the display dust cover as this set came with it. As the Ikea display cabinet is already full, the dust cover is perfect for keeping the dust out of DIY project number 12, which I anticipate, I will put on the table.
The first miniature with a dust cover
So now, I have a dozen miniatures completed! Wow. Project number 13 will be next soon.
Lately, I can’t find the right opportunity to get going with DIY project number 12. Maybe because I can play golf again with the MCO relaxed, the need to kill time at home is not so essential. After all, a round of golf will take up almost half the day, whether it is a morning or afternoon tee-off.
Also, there are things to do in the office, and I have been going to the office. By the time we head home, the usual evening dinner routine and chores leave hardly any window for me to sit down at my little station to work on the miniature. Oh well, I am not rushing to complete it.
Almost done with this
But luckily, towards the end of last week, I had time as I did not play any weekday golf, and work at the office was complete. So I think the project is at the tail-end, and I should complete it soon.
The remaining decor items to completeProject #12, a wonderful piece
DIY project number 12 started immediately upon the completion of DIY project number 11. And it has been slow, very slow. There were things to do in the office, and I was busy. As such, there wasn’t much time to devote to number 12.
DIY Project #12, Dragon Gate Inn
The week before Chinese New Year, we were working late every day. I didn’t even have time to cook, what more to work on my miniature project?
Nonetheless, it is not a race to complete project number 12 but a time-filler to pass the time.
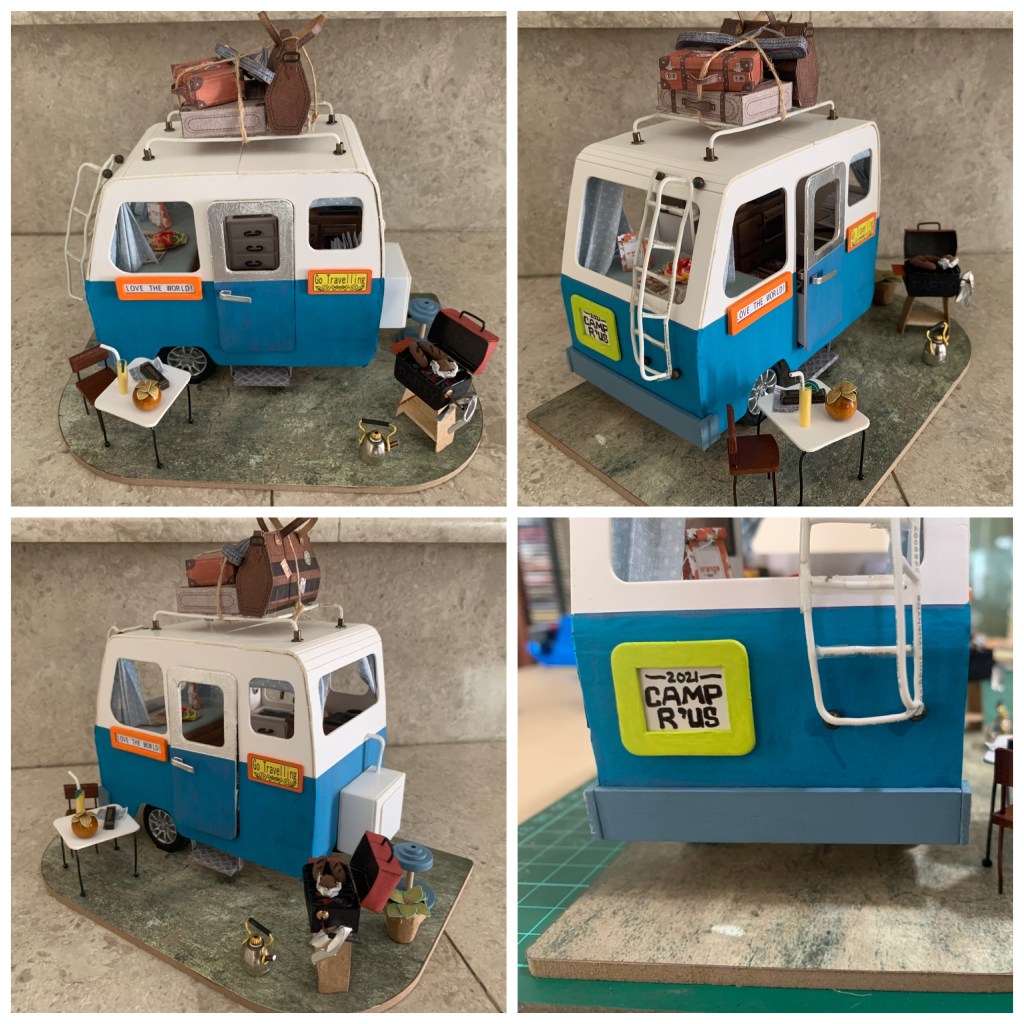
I did not know what to expect from DIY project number 11 as it was different from all the others that I have completed. The set was smaller, and the materials different. Although I had a good momentum working on it in the early stages, it got stalled because I veered off to do gardening.
Eventually, I completed the set in under two weeks, an achievement of sorts given the circumstances. Towards the end, I customized a lot of things, deviating from what the box showed.
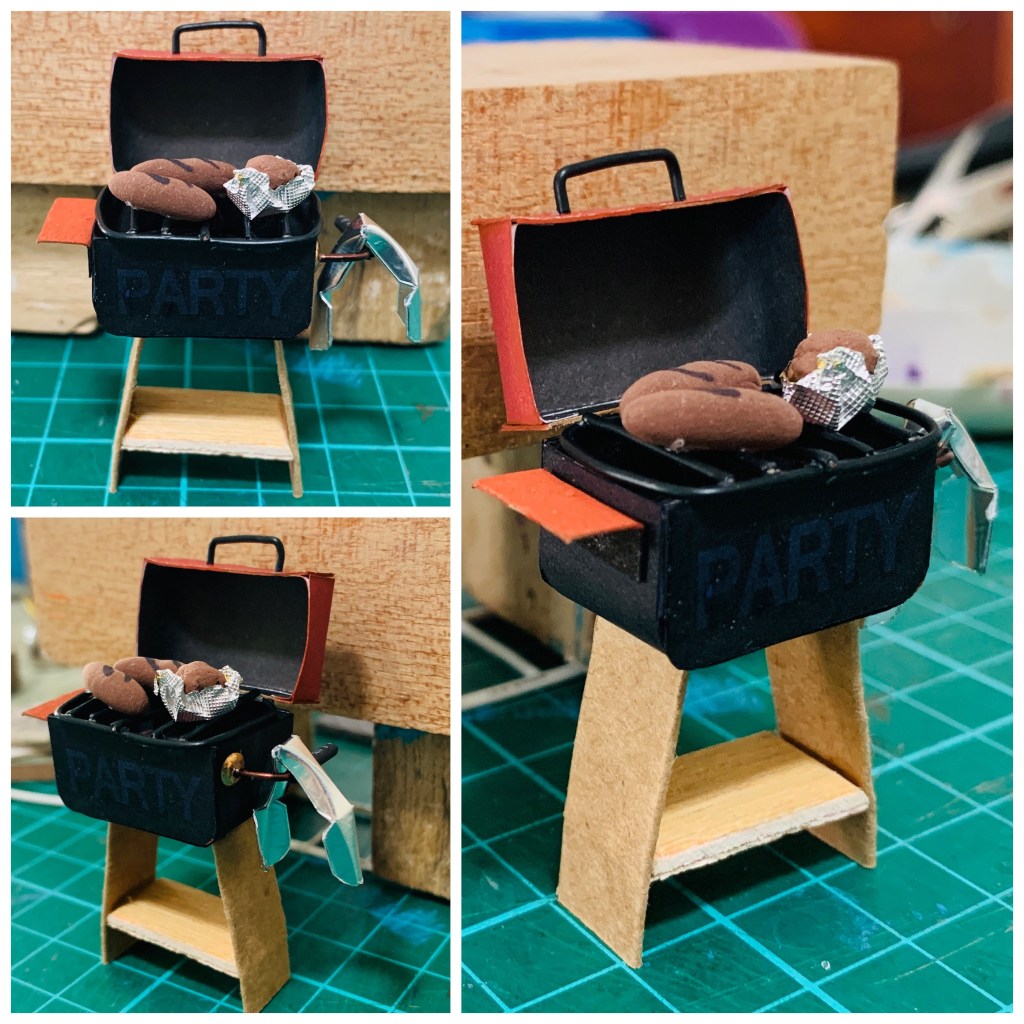
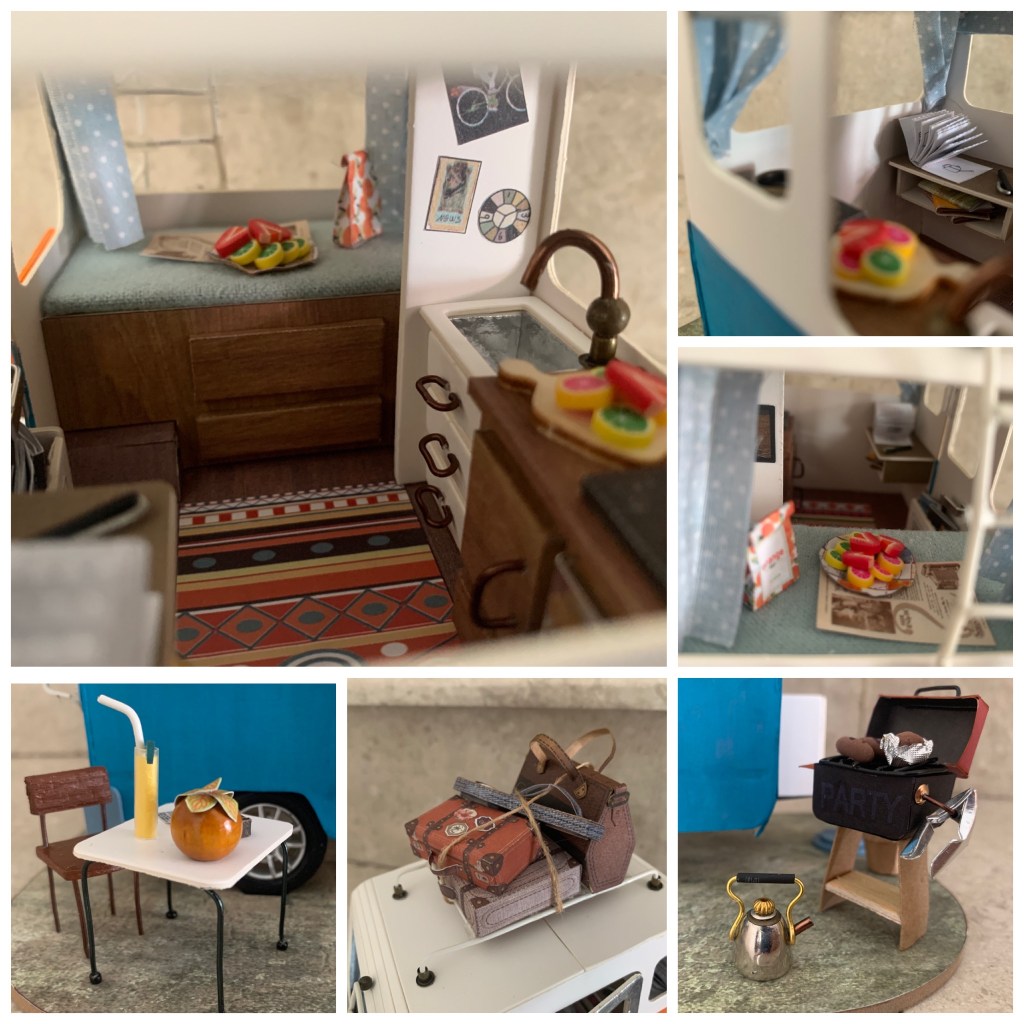
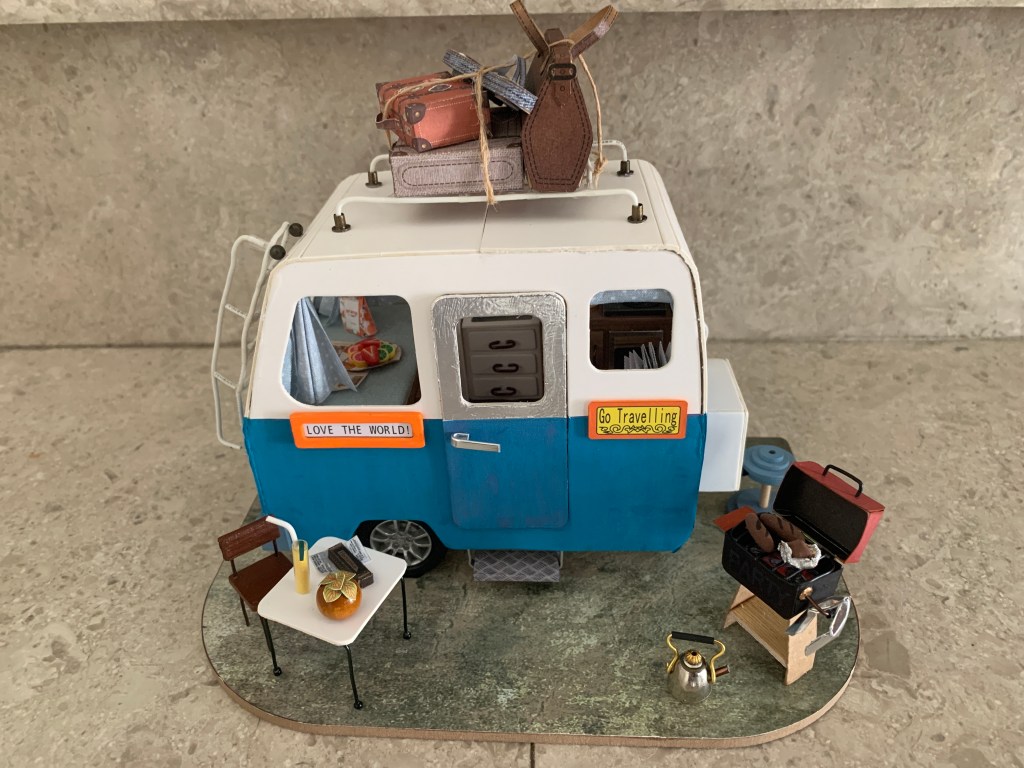
The thing that I am most proud of is the little BBQ grill pit. I gave it a more sturdy set of legs, a handle to hang the tongs, and a side tray. To add more realism, I added two fat chorizos and a baked potato on the grill! It was fun working on this piece.
Other items that had makeovers were the chair, table, and kettle. The chair was accidental because I cut the wrong wires to make the legs. As I did not want to waste the material, I improvised the chair. So it ended up looking like this instead.
What they should be and what they ended up being
I changed the table shape and material from the original, and this worked out well. I even changed the items on it, replacing the lantern with a tall glass of lemonade. The kettle had a minor change in the materials used.
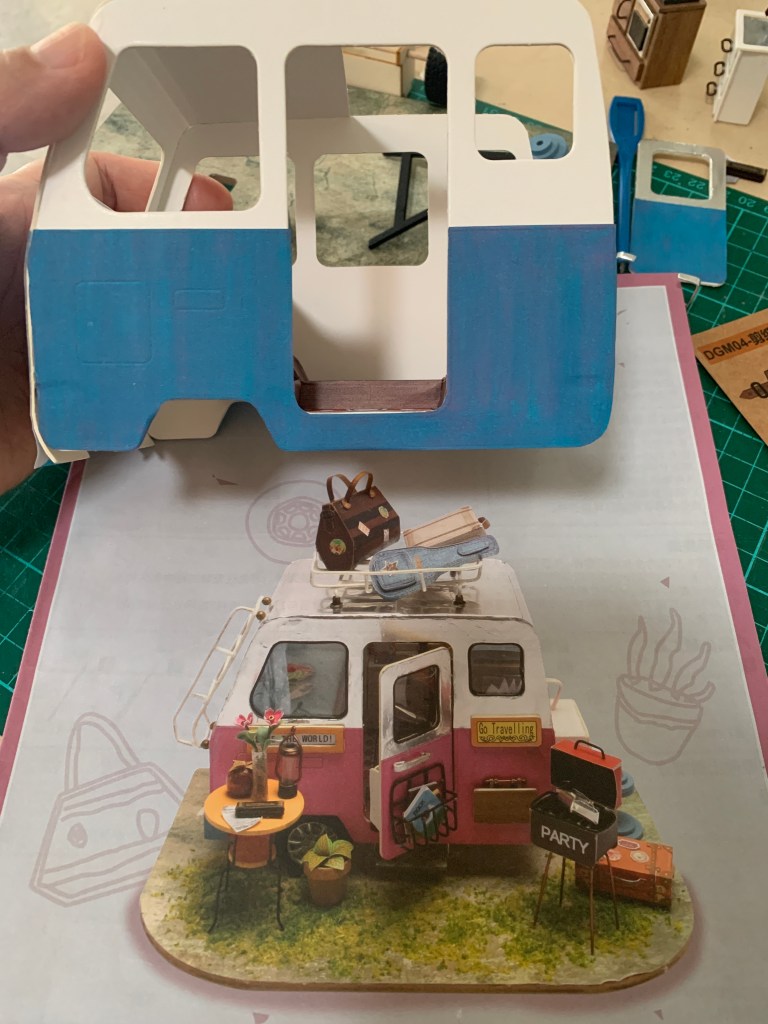
In the end, I simplified the roof rack and put all the bags on there, and I chose not to install the lights in the camper van because I did not think it was necessary. So far, all the other completed DIY sets sitting in the Ikea display cabinet have yet to see any lighting action.
Sewing the curtain ends and making crease lines with an etching roller
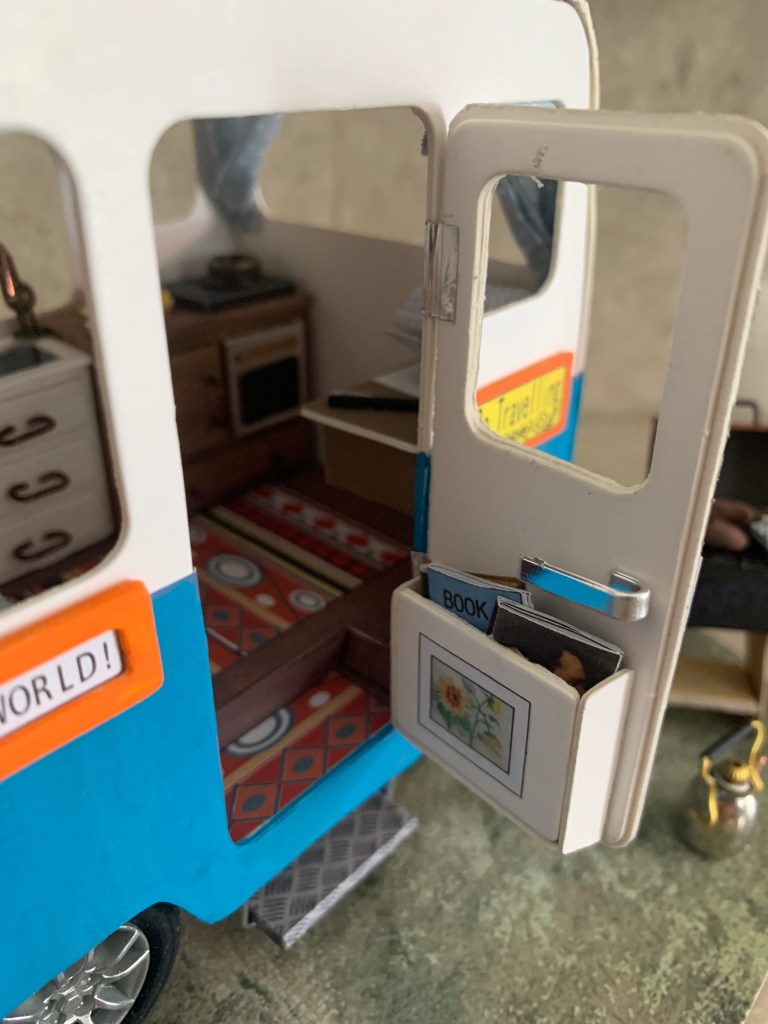
I also did not install the plastic pieces on all the window panes and added hinges on the door. Having learned from my first DIY project number one, the bungalow, I decided to leave the plastic out. I had all the itty-bitties done up so painstakingly, only to have transparent plastic block a clear view of them when I tried to photograph the insides of the bungalow. So this time, the camper van interior is photographed better.
Details of the camper The hinges are silver stickers
I felt putting hinges on the door was a good idea to open and close the door instead of having the door stuck in one position. It’s fun to play with this!
Overall, I am happy with the outcome of DIY project number 11. And with its completion, project number 12 is next to work on!
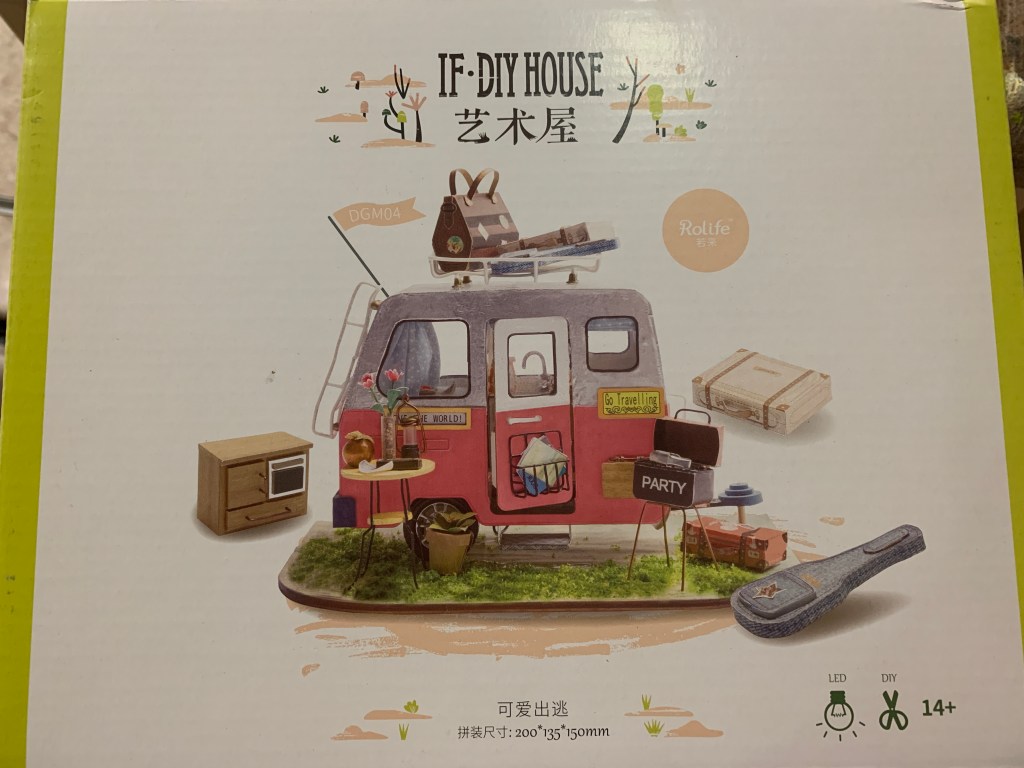
DIY project number 11 started right after number ten was completed. This set is very different from the others that I have done. It is a camper van! A very cute one too.
Project number 11, a camper van
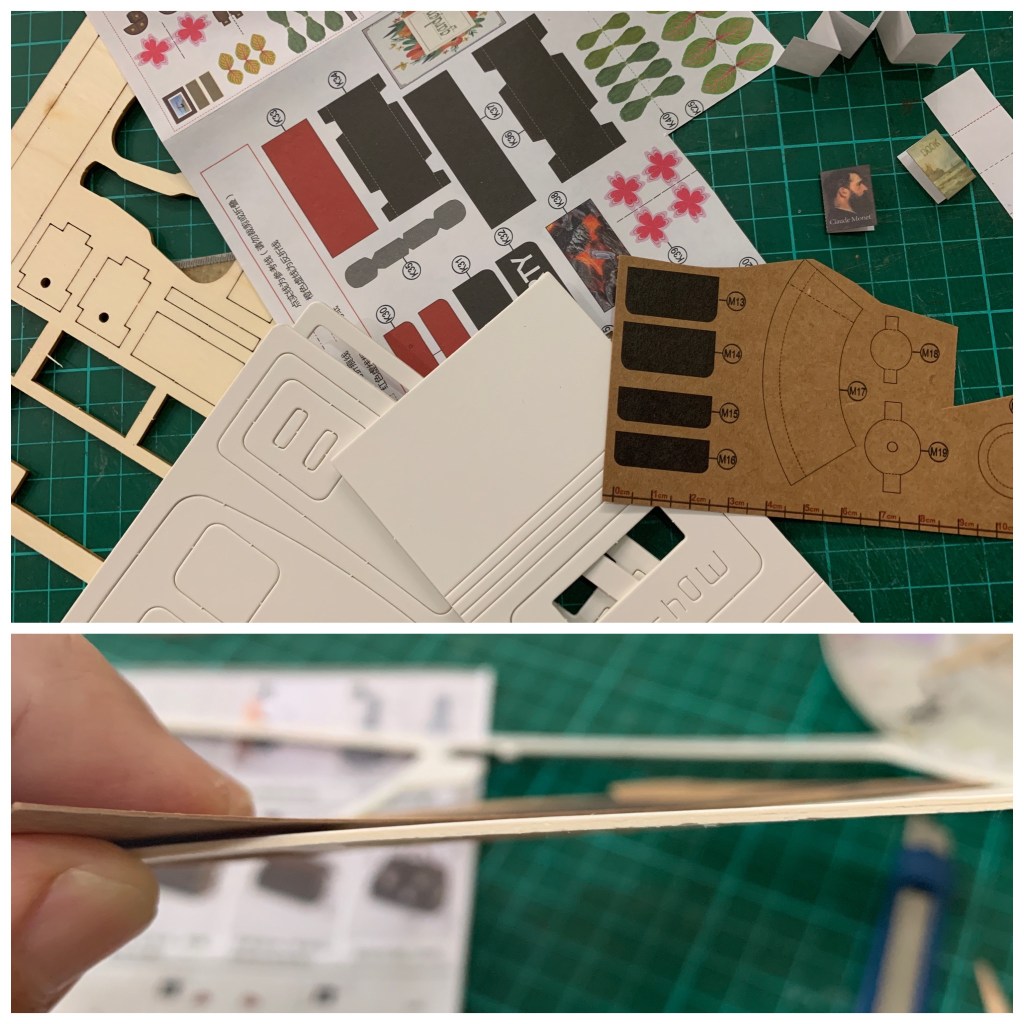
The set is also different in terms of materials used. Typically, the DIY projects that I have worked on use wood, fabrics, wires, and paper. This one combines the usual and cardboard! The cardboard comes in two variations – an 800 gm (or thereabouts) white-based board and a 300 gm brown-based cardboard. Interesting.
Top: the various paper materials, bottom: comparing the thickness of the brown and white cardboards
So far, the project is coming along well. I decided to customize this set too. The main thing that received a makeover is the color of the van. The original pink color is now a turquoise blue. I think it looks fab. I am sure I will change a few more things along the way.
But the wiring work. Oh my goodness! So intricate and looks dreadful. I hope I can overcome this trepidation and get it right. We shall see.
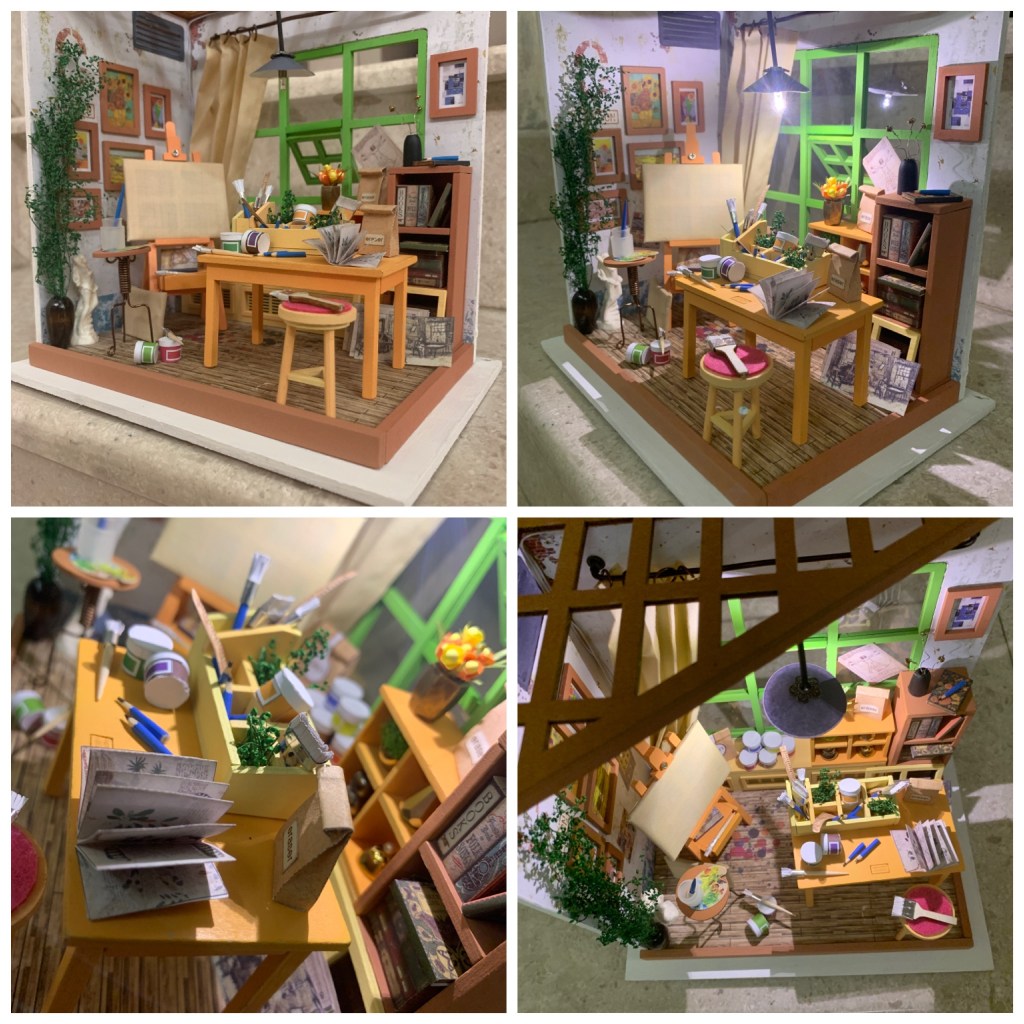
Last week, DIY project number ten was somewhat complete. But one cannot tell the difference if I did not say anything. In terms of decoration, I left some accessories out, and I did not glue everything down.
I like the idea of moving the furniture pieces around. There’s interaction involved rather than merely admiring the craftsmanship. I also did not complete a couple of canvases because I wanted to customize using my painting and art collection instead of the art pieces provided.
Canvases were intentionally left blankThese itty bitty art pieces were left out
However, with the MCO in place, customizing was out of the question. There was insufficient time to print (at the office) the pictures that I wanted to include as the home printer ran out of ink. That’s why I left the canvases blank. Well, when the opportunity presents itself, I will complete this final step.
Soon after I finished the set, I started on project number 11 the next day. And two days later, the latest online DIY purchases arrived! With so many DIY projects waiting for me, being restricted under the MCO is not that bad after all.
Before I could finish DIY project number ten, I had a sudden itch to acquire more DIY sets. The stash of three unopened sets does not seem enough for me!
So what did I buy from my favorite online site? Well, I bought not one but two sets this time – an Oriental restaurant and a bookstore.
I certainly enjoy working on these types of DIY sets more compared to bedroom studios or house sets because there are fewer fabrics to deal with. Fabrics are not so fun to handle, at least for me.
Both parcels arrived yesterday, and I’m giddy again. So many sets to work on!
We were all expecting it, another lockdown. True enough, on Monday, the announcement came that MCO (Movement Control Order) 2.0 will be enforced from January 13 to 16, 2021. However, not the whole nation will be under MCO, only states with a high number of positive Covid cases. And where I live, we are affected, and thus, we have to follow the MCO rules. States that are faring better will be under either the CMCO or RMCO phases.
This lockdown is inevitable as the public healthcare sector cannot cope already with the surge of positive cases in four-digits for several days now. During this MCO phase, SOPs are more strict going out and being out in public areas. If possible, don’t go out.
So for the next two weeks, golf outings are out of the question. Maybe this is for the best. I can rest and focus on DIY project number ten that has stalled.
Design work in the office picked up a little during the last two weeks. As such, I couldn’t devote too much of my time to my whimsical project because I was tired-out when I got home. But now, with this forced break and no golf, I can focus on it. Perhaps I can complete DIY project number ten before the two weeks are up? We shall see.
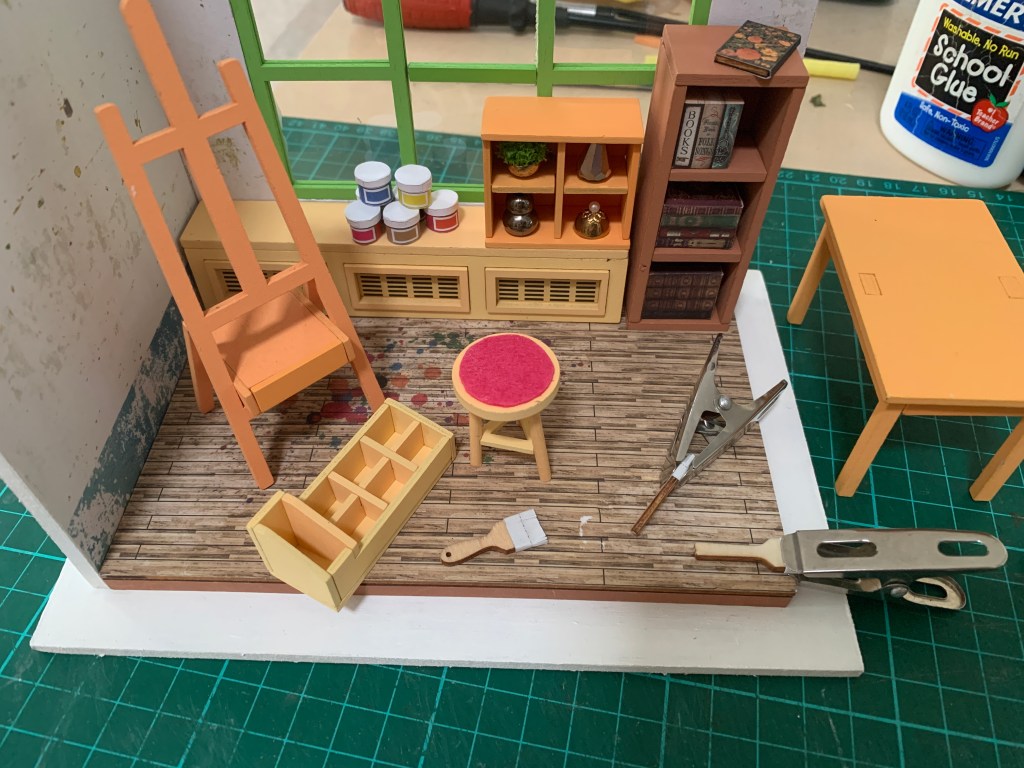
With the dawn of the new year, DIY project number ten kicked in. It’s been 11 days already that I have been working on it, albeit slowly. After the big disappointment of project number nine, this was a welcome change. I am taking my time on this project because I want to customize certain things.
Project #10
I learned from my Facebook DIY group about customizing miniatures. These die-hard fans changed colors, materials, and props in all the projects that they did. Spurred by their creativity, I experimented on project number eight. But it was only a color change on the wall, nothing too elaborate or drastic. That was as far as I went, and no other changes or additions in terms of materials and props.
So this time, I want to push further to see how much I can customize. We shall see as I progress along for DIY project number ten!


Remarks