Goodbye Year 2020! What a year it turned out to be. I felt that it was a year that wasn’t – in other words, we were, firstly, short-changed for nine months in our lives and secondly, didn’t turn out so great as many envisioned it would be.
Before reaching this nice number, people, myself included, thought it would be a spectacular year. But alas, how wrong we all were. The Covid-19 pandemic created so much havoc in the world. And everything is never the same again.
Gone are the closeness and freedom that we took for granted with our movement with friends, society in general, and places we visit; in place, it is now constant caution, fear to a certain degree, and restriction.
For me, I felt my 2020 was just three months only, the first quarter of the year. After we went into lockdown in March, the next nine months, day-in, day-out felt like deja-vu. A new routine was born, and old habits had to give way because we had to learn to adjust to the new normal. Thank goodness we didn’t go crazy with cabin fever, and instead, discovered ourselves in many other aspects.
I learned to appreciate my friends, the home, and family more. Although work at the office took a beating to practically zero design work in March and April, it did not dampen our spirits. M2 came back from Ireland and had an extended six-month summer break. M1 stayed put, and we talked every morning to keep her company.
The new normal made both of us manage our time better to be more productive in other things. Hubby learned to bake, an unthinkable endeavor in all the years that I have known him, and I brushed up my cooking skills to widen the variety in our meals because eating out was not an option.
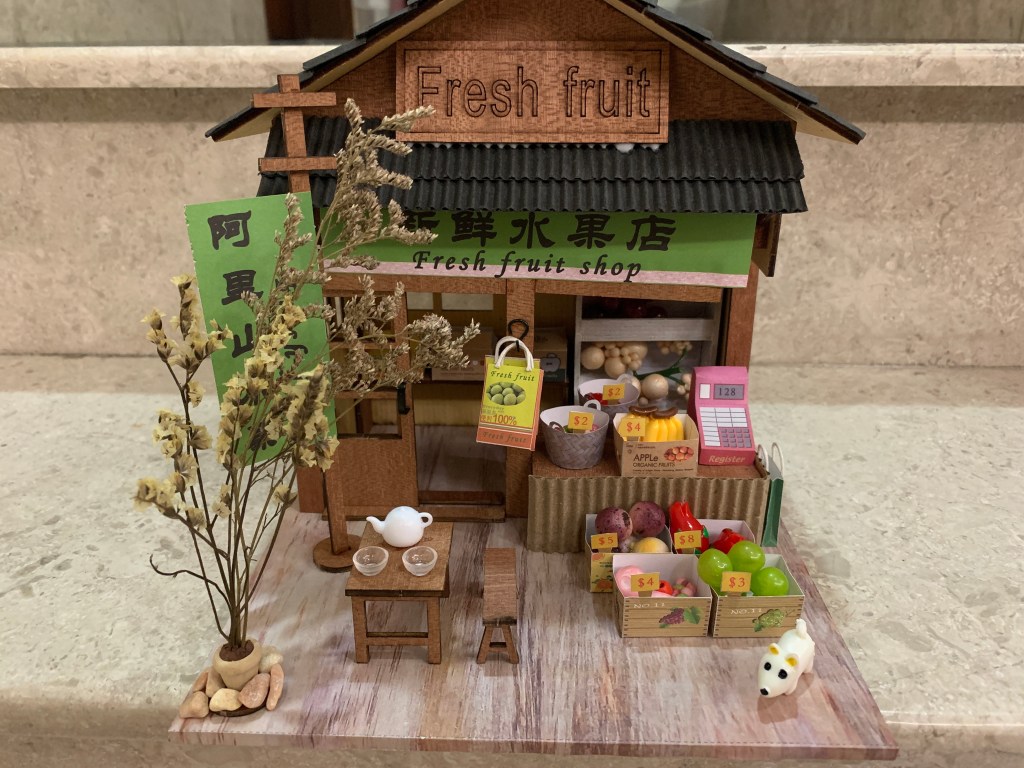
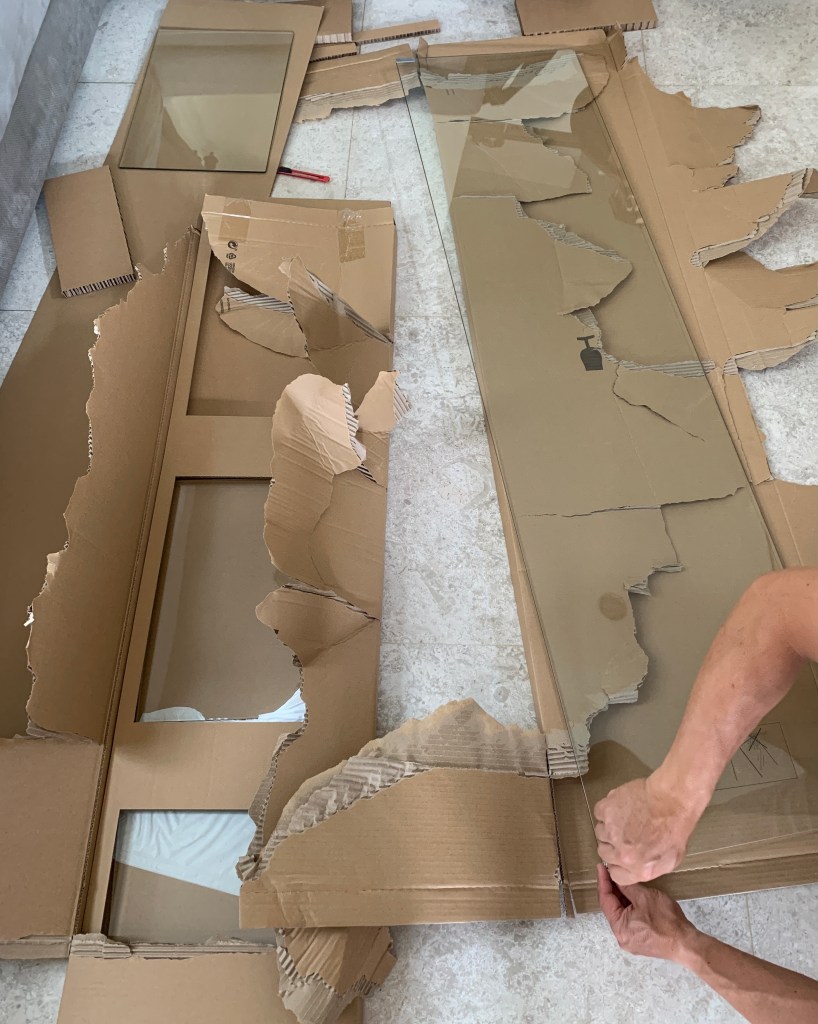
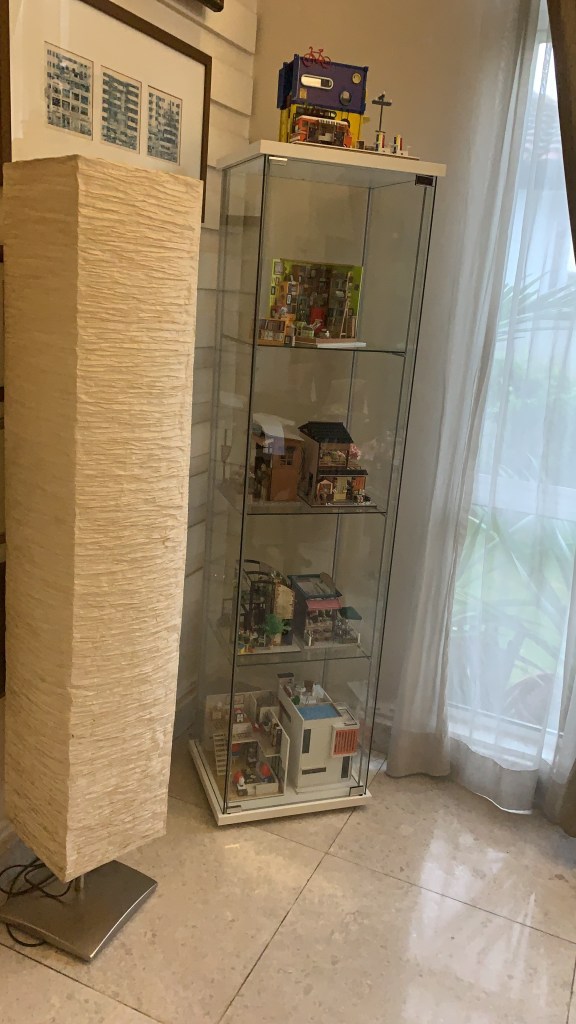
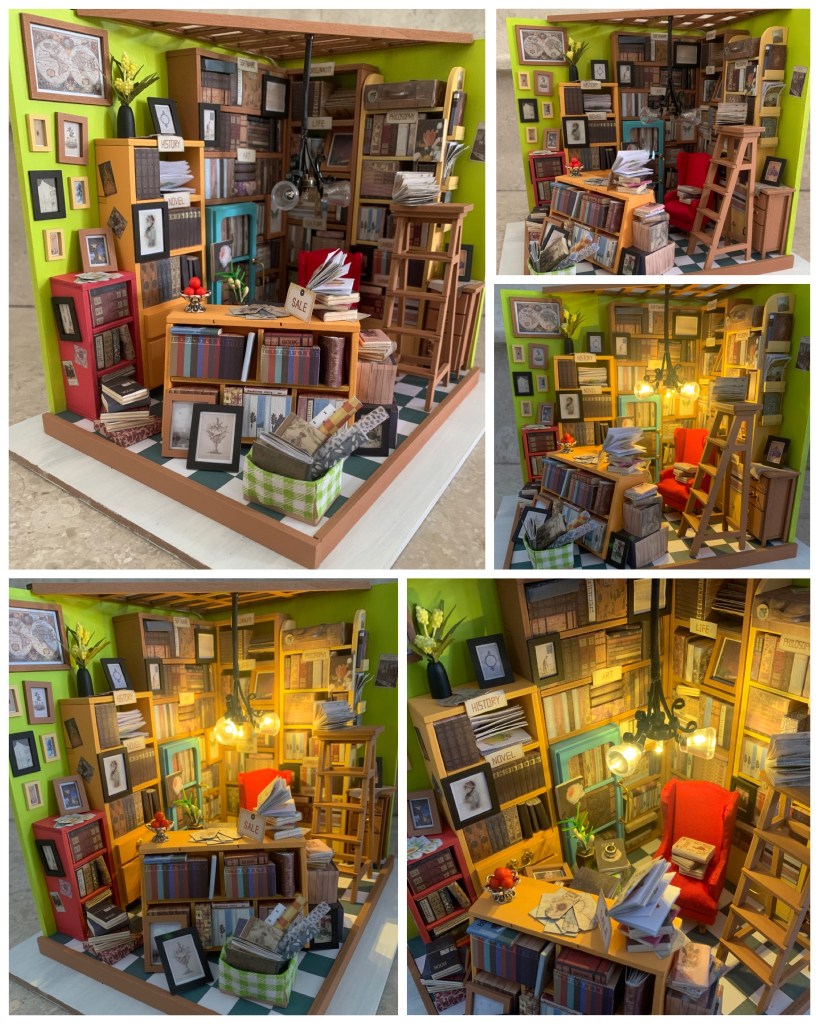
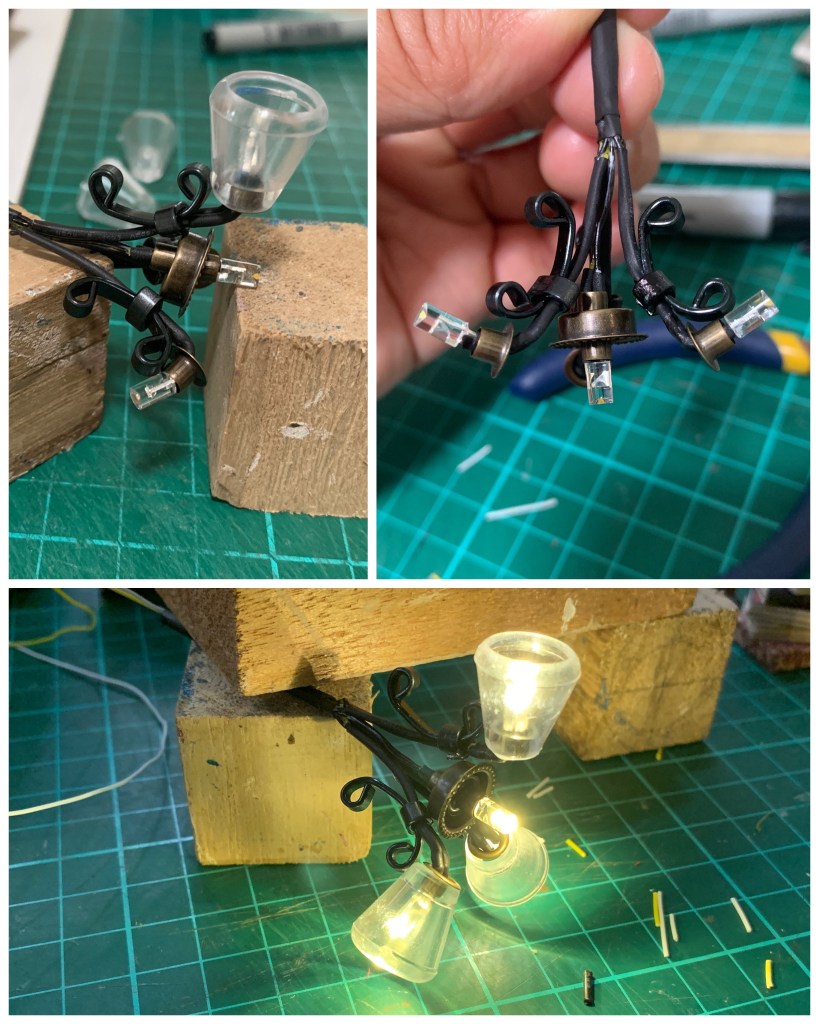
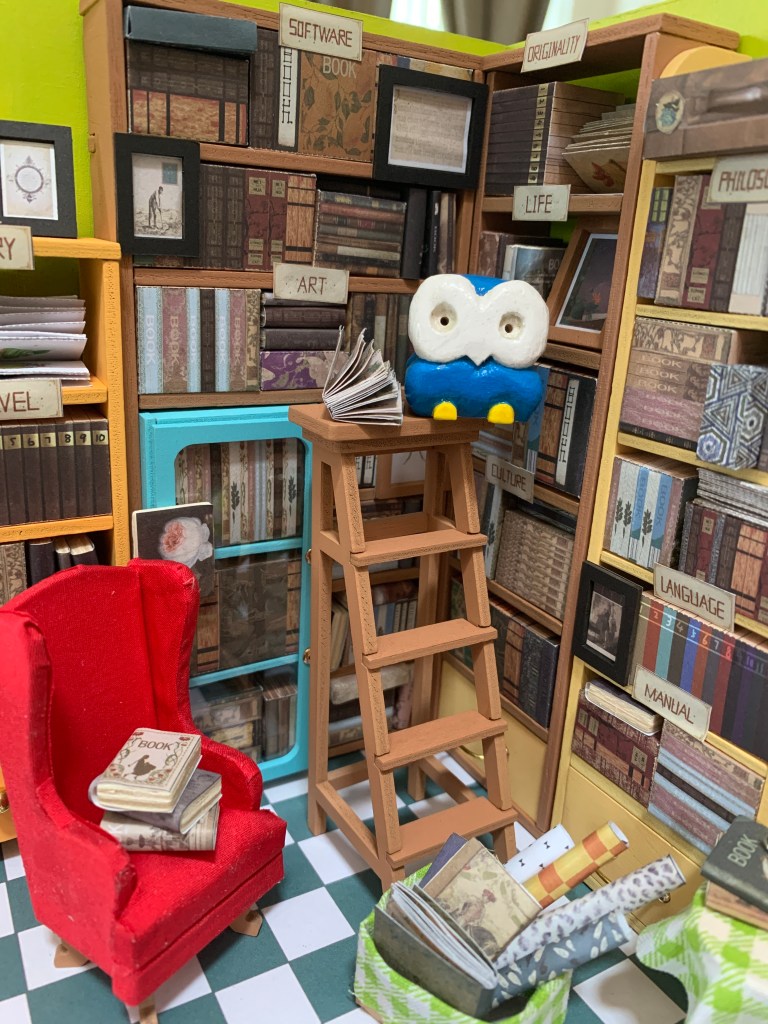
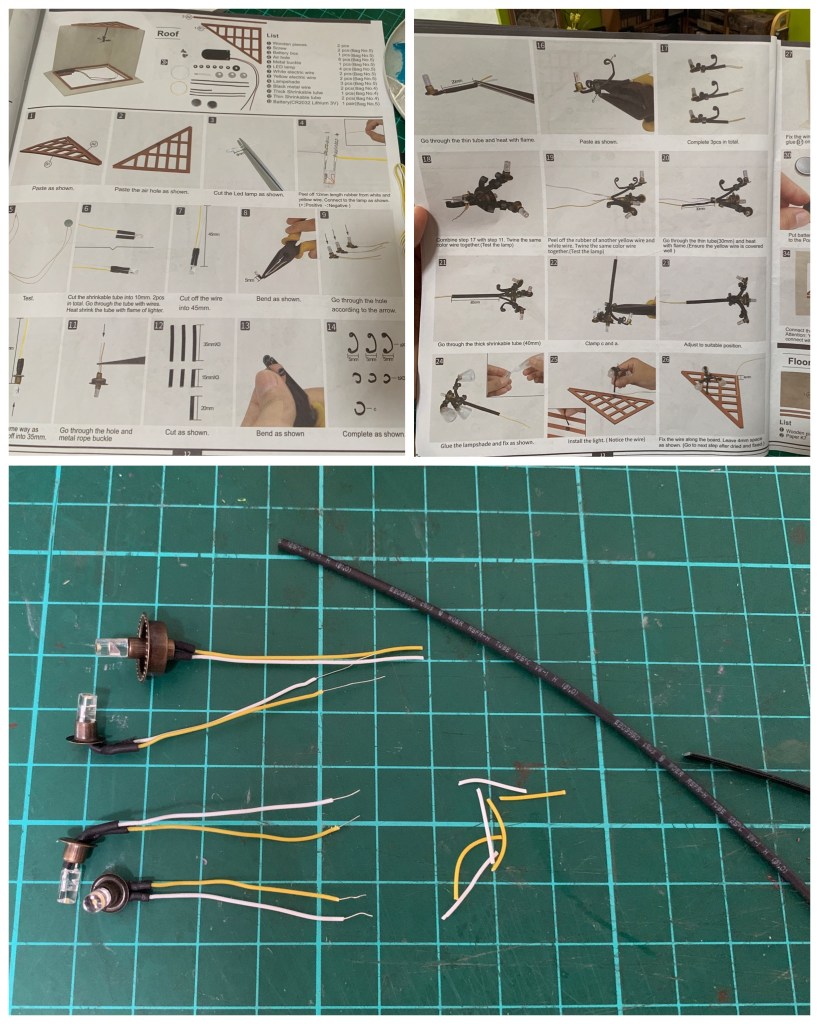
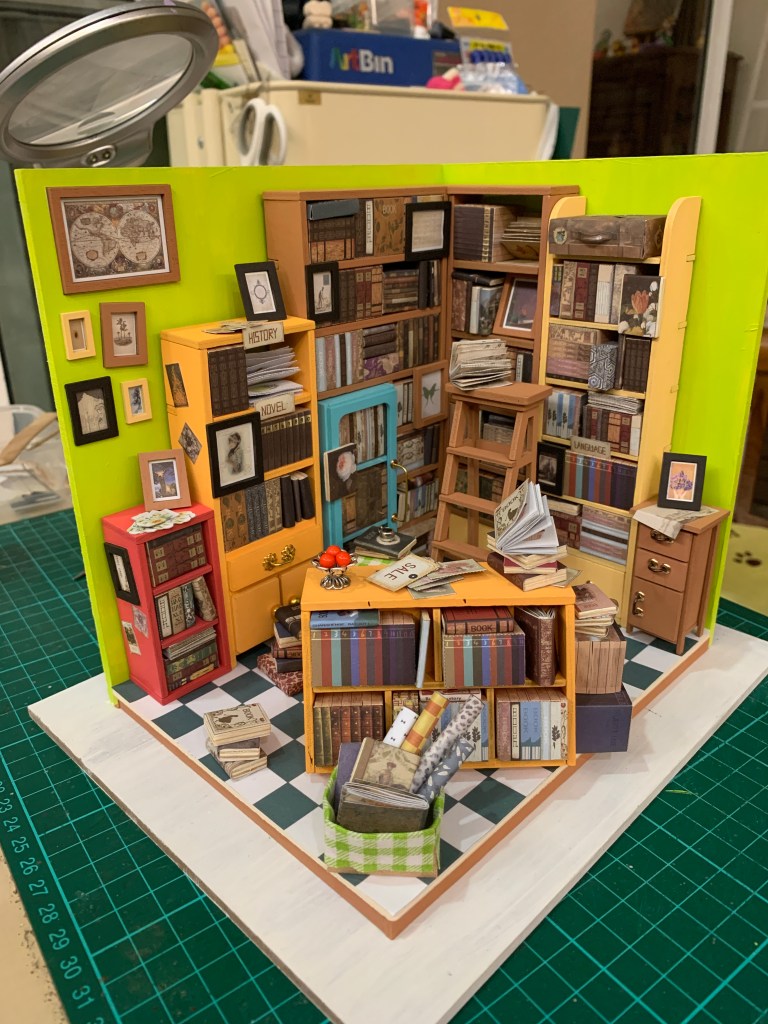
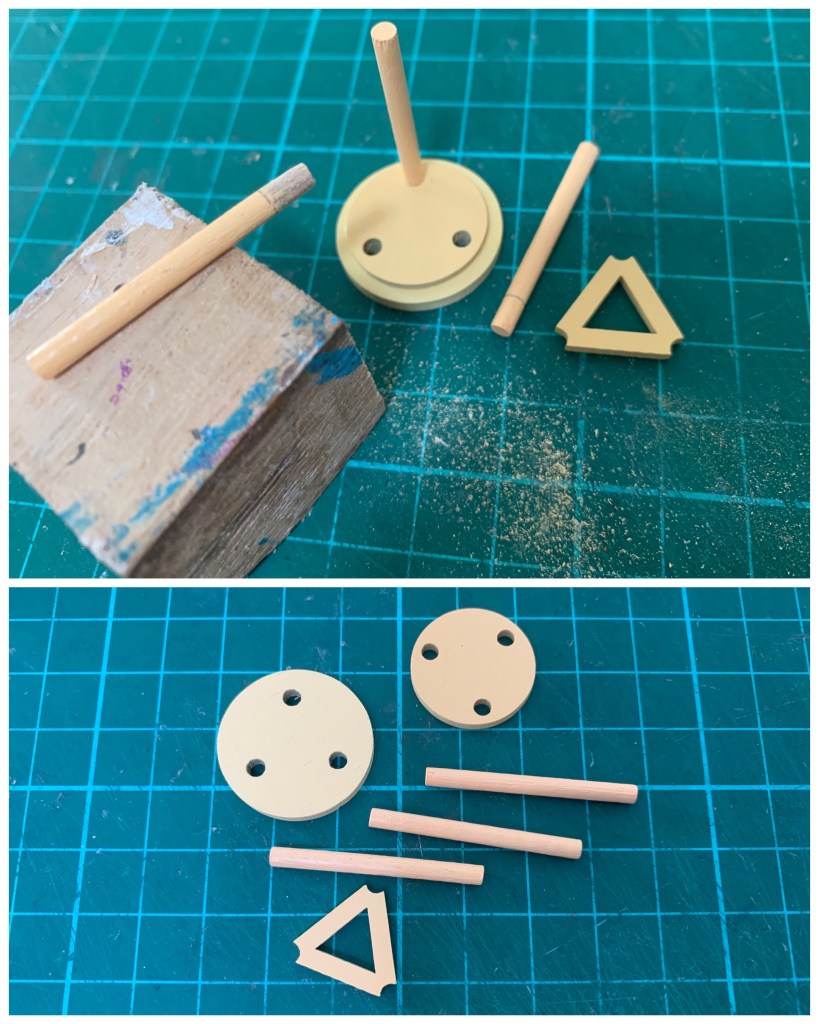
I also picked up a new hobby to keep myself busy after my Meranti wood supply for carving depleted by May. From June onwards, I started working on DIY miniature sets, and have completed nine DIY sets thus far in a spate of six months.
Another good thing that came out of this situation was my golf game, which improved tremendously. With downtime in the office, I was playing more golf than ever. After the lockdown eased, and golf was allowed because it is an outdoor activity, I was golfing up to four times a week! So maybe the year wasn’t that bad after all on the personal front despite being in deja-vu mode.
As 2020 is behind us now, it does not mean the pandemic is over. Far from it, in fact. We should remain vigilant, put on our masks whenever we are in public areas, and keep a one-meter distance apart to be safe.
A toast to a better year ahead – may 2021 bring better fortune and goodness for everyone. Happy New Year, and stay safe wherever you are!
Tags: baking, carving, College, cooking, Covid-19, Design, design studio, DIY, DIY house, Family, friendship, golf, Graphic Design, Ireland, lockdown, Meranti, Meranti wood, miniature, Office, Office work, pandemic, quarantine, United States, University, USA


Remarks