
The various stages of carving a Whale
With so much Meranti wood, every evening I am kept busy! When the sun is up, I would be playing golf (especially this week) but when the sun goes down, I would be carving.
The process is simple, find two Meranti blocks that are about the same size to Elmer-glue together. Then clamp it down with the work bench for a day or so before carving. And although there’s a fixed set of measurements and angles to ensure every piece is standardised, there are still some variations. After all, it’s wood that I am dealing with and the carvings are all hand-made.
The chipping, carving and initial shaping does not take long. This is the fun but dusty and messy part. If I stay focused, I usually get one piece done a night depending on what time I start. It is after the carving that the process takes longer and sometimes tedious too because every step of the way requires time or even have to be repeated.
Details on the eyes and tail take time. The eyes are usually marked, carved out first before drilling to ensure it’s perfectly round and even. For the tail, it’s the curves and corners that I have to work on. Then the sanding and filing to shape the overall curves.
Putty work is next to patch ugly holes and the piece is then left to dry, taking time because this curing process cannot be hurried. When the piece is ready—usually a couple of hours or more depending on how much is applied—more sanding and filing, creating more dust and mess. Sometimes this step needs to be repeated if the patch work is insufficient to even out the holes properly.

Putty work: before and after comparison
But when all patch work are completed, a coat of white gesso is applied and the piece is left to dry again for another day. The next step – more sanding to smoothen the surface before a second coat of gesso. By now it’s the fourth or fifth day from the first cut.
Once I am satisfied with the surface, on goes the acrylic paint, two coats over two days. Of all the colors I have, the new Glitter Blue color is most problematic because it requires more than two coats, several coats in fact to be even.
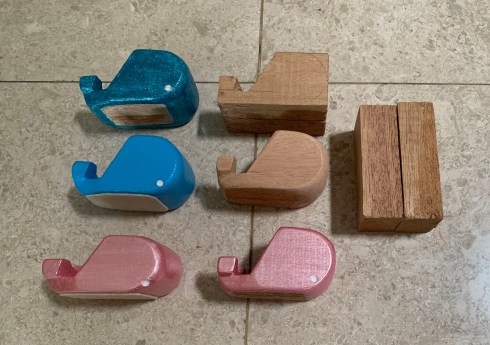
The last process is the gloss varnish, also two coats, before the final touches are added – the felt cloth on the base, the date and my signature and voila! The piece is finally complete.
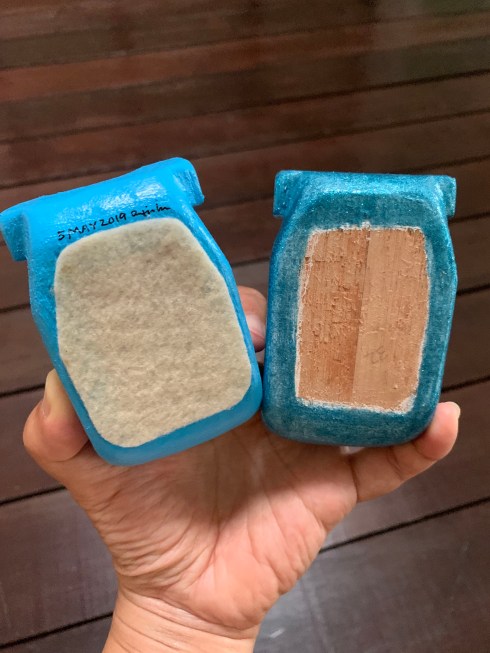
Before and after of the final touches with felt base, date and my signature!
With the fresh supply, I find myself repeating this routine every other night with several pieces overlapping each other in various stages of the process. Tedious, repetitive but enjoyable.
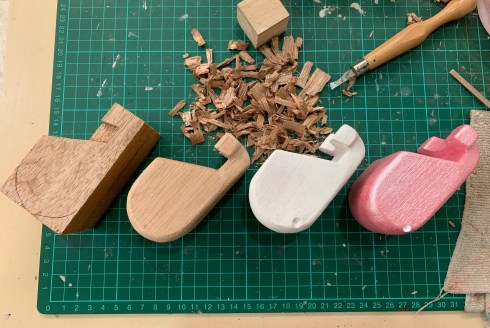
Working on four pieces in various stages simultaneously

Leave a comment